在 Android 模拟器中安装 busybox
在Android模拟器中安装busybox
【背景】:
Android模拟器的shell真是难用啊,很多命令都不支持,如find、grep、send等等,最近正好有时间,想捣鼓捣鼓,用交叉编译将busybox安装到模拟器中去。
【具体步骤】:
1)下载busybox源代码,并解包
$ wget -chttp://www.busybox.net/downloads/busybox-1.7.0.tar.bz2
$ tar jxvf busybox-1.7.0.tar.bz2
2)下载交叉编译工具,并安装
我下载的是:arm-2009q1-161-arm-none-eabi.bin
说明:要正确设置好PATH变量。
例如将“你的目录”/CodeSourcery/Sourcery_G++_Lite/bin加到PATH路径中。
3)进入到busybox解压后的源文件目录中,修改Makefile
将第176行改为:
CROSS_COMPILE?=arm-none-linux-gnueabi-
4)进行编译选项配置
a、
$ make menuconfig
Busybox Settings --->
Build Options --->
[*] Build BusyBox as a static binary(no shared libs)

说明:这个选项一定要选,这样才能把busybox编译成静态链接的可执行文件,运行时可以独立于其他库。
b、
Installation Options --->
[*] Don't use /usr

说明:这个也一定要选,否则make install后,busybox将安装在原来系统的/usr下,将你原有的命令都覆盖了!
5)配置好后可以编译了,执行如下命令:
$ make
发现没过多久,就报错了,晕,错误内容如下:
applets/applets.c:20:2: warning: #warning Static linking against glibc produces buggy executables
applets/applets.c:21:2: warning: #warning (glibc does not cope well with ld --gc-sections).
applets/applets.c:22:2: warning: #warning See sources.redhat.com/bugzilla/show_bug.cgi?id=3400
applets/applets.c:23:2: warning: #warning Note that glibc is unsuitable for static linking anyway.
applets/applets.c:24:2: warning: #warning If you still want to do it, remove -Wl,--gc-sections
applets/applets.c:25:2: warning: #warning from top-level Makefile and remove this warning.
applets/applets.c:26:2: error: #error Aborting compilation.
make[1]: *** [applets/applets.o]错误1
make: *** [applets]错误2
看到它给出了提示,说glibc库不适和用来静态编译,最后给出解决方案就是将applets/applets.c中这部分内容给去掉,也就是19-27行。
然后再make进行编译。
不多久又报错了,看看具体错误:
.../compal/CodeSourcery/Sourcery_G++_Lite/bin/../arm-none-linux-gnueabi/libc/usr/include/linux/netfilter.h:56:17: error: field 'in' has incomplete type
.../CodeSourcery/Sourcery_G++_Lite/bin/../arm-none-linux-gnueabi/libc/usr/include/linux/netfilter.h:57:18: error: field 'in6' has incomplete type
ipsvd/tcpudp.c: In function 'tcpudpsvd_main':
ipsvd/tcpudp.c:314:10: warning: ignoring return value of 'write', declared with attribute warn_unused_result
make[1]: *** [ipsvd/tcpudp.o]错误1
make: *** [ipsvd]错误2
看到说在我们下载的交叉编译库中有个头文件中的in及in6类型不对,解决的办法就是:
在.../arm-none-linux-gnueabi/libc/usr/include/linux/netfilter.h的开头
添加缺少的头文件:
#include <netinet/in.h>
然后再进行编译。(这次可以安全到最后了,呵呵)
结束后会在当前目录下看到busybox这个可执行文件。
6)编译步骤已完成,下面就将busybox这个可执行文件放到Android模拟器下去
$ adb push busybox /system/xbin
说明:若是出现什么read-only file system等等之类,执行如下命令即可:
$ adb remount
要是老是不行,那就重新启动adb
$ adb kill-server
$ adb start-server
要是碰到什么内存不足等等,那原因就是你的那个Android模拟器是用Eclipse打开的。解决办法就是,手动启动你的Android emulator模拟器,具体如下:
$ android list avd#注释:列出你所有的模拟器
$ emulator -avd your_emulator_name -partition-size 256
注意:最好放在/system/xbin下面,这样当你在模拟器里使用busybox时不需要指定绝对路径了,否则的话谁都会疯掉嘛,呵呵。
7)输入adb shell进入终端,执行看看
# busybox --help
BusyBox v1.7.0 (2011-04-22 20:53:21 CST) multi-call binary
Copyright (C) 1998-2006Erik Andersen, Rob Landley, and others.
Licensed under GPLv2.See source distribution for full notice.
…

说明:表明我们的busybox已经可以执行了。但同时又有一个问题,每次输入一个命令都要加上busybox,那么人又要疯掉了,-_-!。解决办法就是,我想到可以使用alias命令嘛,给我们所有输入的东西都自动加上busybox,具体如下:
【方法1】:
将你所感兴趣的命令集中在一个脚本中打包,例如建立内容如下的脚本:
#!/bin/sh
# set_alias1.sh(当然你名字可以随便改,越短越好,但不要和命令重名)
alias ls='busybox ls'
alias find='busybox find'
…
保存好后,将其push到模拟器中的/system/xbin下面,然后用adb shell进入到模拟器终端后执行如下命令:
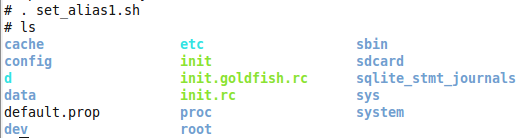
# . set_alias1.sh#注释:在当前进行中执行该脚本(一定要有"点")
【方法2】:
以上方法虽然能解决问题,但总觉得添加这么多东西也怪烦人的,写个智能点的脚本:
xxx:~/code/shellcode$ cat set_alias.sh
#!/bin/bash
# set_alias.sh
pre_handle_result=$(busybox echo -n $(busybox --help) | busybox grep -v '^/t')
pre_cmds=${pre_handle_result##*[[, }
sec_cmds=$(busybox echo -n $pre_cmds | busybox sed 's/,//g')
for cmd in $sec_cmds
do
# alias cmds
alias $cmd="busybox $cmd"
done
然后将其push到模拟器中的/system/xbin下,执行过程如上。
8)差不多了,祝使用愉快。
更多相关文章
- 在android 中导入项目后 包出现错误
- Android 开发入门问题集:启动模拟器、安装卸载apk、项目调试、导
- 一定是我打开的姿势不对——Android下使用kill命令杀死指定进程
- Android模拟器使用SD卡
- Android应用程序中执行二进制命令
- Android SDK: adb shell 命令的使用(am、pm、wm、screencap、monk
- Android常用的几个命令