vue组件与路由
16lz
2021-04-17
1.vue组件
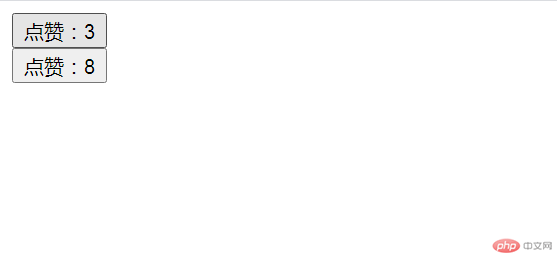
(1)全局组件
代码块
<!DOCTYPE html><html lang="en"><head><meta charset="UTF-8"><title>全局组件</title></head><body><div class="app"><button-inc></button-inc></div><div class="root"><button-inc></button-inc></div><script src="https://cdn.jsdelivr.net/npm/vue/dist/vue.js"></script><script>//全局组件,声明在Vue实例的外部,全局可见//全局组件:在多个Vue实例中均有效,所以它是全局的//不推荐使用全局,尽可能用局部组件Vue.component('button-inc',({template: `<div><button @click="count++">点赞:{{count}}</button></div>`,data() {return {count: 0}}}))new Vue({el : '.app'})new Vue({el : '.root'})</script></body></html>
效果图
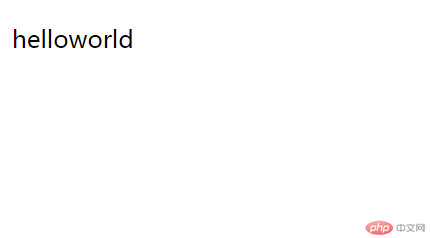
(2)局部组件
代码块
<!DOCTYPE html><html lang="en"><head><meta charset="UTF-8"><title>局部组件</title></head><body><div class="app"><hello></hello></div><div class="root"><hello></hello></div><script src="https://cdn.jsdelivr.net/npm/vue/dist/vue.js"></script><template id="hello"><p>hello{{site}}</p></template><script>const hello = {//可以将大段的html字符串写到html文档的template标签中,并用id进行关联template : "#hello",data(){return {site:'world'}}};//局部组件必须声明在Vue实例中new Vue({el : '.app',components : {// 可以同时声明多个局部组件//hello: 组件名称,它的值是一个对象// hello : {// template : `<p>Hello {{site}}</p>`,// data(){// return {// site:'world'// }// }// }// hello : hello,// 当属性值变量与属性名相同时,同在一个作用域中则可以省去值变量名称hello,}});</script></body></html>
效果
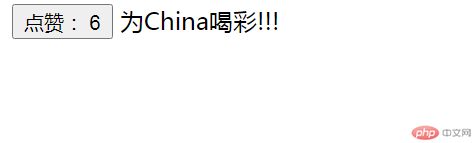
子组件 传参" class="reference-link">(3)父组件 —>子组件 传参
代码块
<!DOCTYPE html><html lang="en"><head><meta charset="UTF-8"><title>传参:父组件 --》 向子组件</title><script src="https://cdn.jsdelivr.net/npm/vue/dist/vue.js"></script></head><body><div class="app"><btn-inc v-bind:my-name="username" :my-count="count"></btn-inc></div><script>//父组件向自定义组件是通过自定义属性穿参const vm = new Vue({el : document.querySelector('.app'),data() {return {username : '为China喝彩!!!',count : 0};},components : {'btn-inc' : {props:['myName','myCount'],template : `<div class="app"><button @click="num++">点赞: {{num}}</button><span>{{myName}}</span></div>`,data() {return {num : this.myCount,}},}}})</script></body></html>
效果
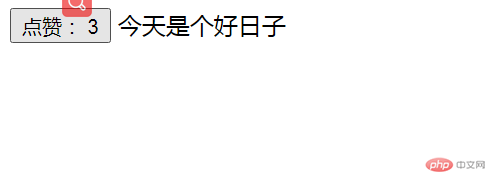
父组件 传参" class="reference-link">(4)子组件 —>父组件 传参
代码块
<!DOCTYPE html><html lang="en"><head><meta charset="UTF-8"><title>传参:子组件 --》 向父组件</title><script src="https://cdn.jsdelivr.net/npm/vue/dist/vue.js"></script></head><body><div class="app"><btn-inc v-bind:my-name="username" :my-count="count" @click-count="handle"></btn-inc></div><script>//子组件向父组件传参是通过一个"同名事件"来传参//组件之间的传参,理论来说是单向的const vm = new Vue({el : document.querySelector('.app'),data() {return {username : '为China女足喝彩!!!',count : 0};},//局部组件components : {'btn-inc' : {props:['myName','myCount'],// 必须关联绑定click-count标签template : `<div class="app"><button @click="$emit('click-count',1)">点赞: {{myCount}}</button><span>{{myName}}</span></div>`,}},methods : {handle(value) {this.count += value;this.username = '今天是个好日子';}}})//总结://1.父组件 --->子组件: 自定义属性 :name, :count//2.子组件 --->父组件: 自定义事件方法://子组件:$emit('父组件中的自定义方法','附加参数值')//父组件:@父组件中的自定义方法='事件方法'</script></body></html>
效果
2.路由
(1)基于锚点的路由实现模式
代码块
<!DOCTYPE html><html lang="en"><head><meta charset="UTF-8"><title>基于锚点实现的路由模式</title><link rel="stylesheet" href="0416/style.css"><!-- <script src="https://cdn.jsdelivr.net/npm/vue/dist/vue.js"></script>--></head><body><!--选项卡--><div class="container"><!-- 导航--><nav><a href="#/list1">国际新闻</a><a href="#/list2">国内新闻</a></nav><!-- 这里显示与导航对应的内容--><div class="route-view"></div></div><script>// console.log(location.hash);let list1 = `<ul><li><a href="">新华国际时评:合则用不合则弃,看清美式“潜规则”本质</a></li><li><a href="">新华国际时评:合则用不合则弃,看清美式“潜规则”本质</a></li><li><a href="">新华国际时评:合则用不合则弃,看清美式“潜规则”本质</a></li></ul>`;let list2 = `<ul><li><a href="">重庆交通大学与四川藏区高速公路有限责任公司共建研究中心</a></li><li><a href="">重庆交通大学与四川藏区高速公路有限责任公司共建研究中心</a></li><li><a href="">重庆交通大学与四川藏区高速公路有限责任公司共建研究中心</a></li></ul>`;const routeView = document.querySelector('.route-view');console.log(window.location.href);// onhashchange:监听url中的锚点的变化window.addEventListener('hashchange',show);//window.addEventListener('load',show);//推荐DOMContentLoaded 代替load,因为创建好dom树就触发了window.addEventListener('DOMContentLoaded',show);function show() {console.log(location.hash);switch (location.hash) {case '#/list1':routeView.innerHTML = list1;return;case '#/list2' :routeView.innerHTML = list2;return;default :routeView.innerHTML = list1;}}</script></body></html>
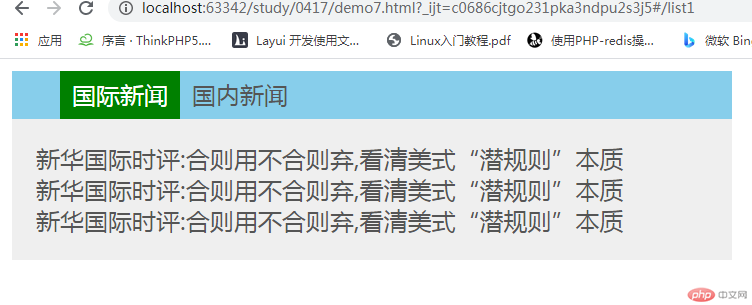
效果

(2)vue路由原理与实现
代码块
<!DOCTYPE html><html lang="en"><head><meta charset="UTF-8"><title>vue路由原理与实现</title><link rel="stylesheet" href="0416/style.css"><script src="https://cdn.jsdelivr.net/npm/vue/dist/vue.js"></script><script src="https://unpkg.com/vue-router/dist/vue-router.js"></script></head><body><!--选项卡--><div class="container"><!-- 导航--><nav><!-- router-link:就是a标签--><!-- to : a 标签中的href--><router-link to="/list1">国际新闻</router-link><router-link to="/list2">国内新闻</router-link></nav><!-- 这里显示与导航对应的内容--><router-view class="route-view"></router-view></div><script>// console.log(location.hash);let list1 = {template : `<ul><li><a href="">新华国际时评:合则用不合则弃,看清美式“潜规则”本质</a></li><li><a href="">新华国际时评:合则用不合则弃,看清美式“潜规则”本质</a></li><li><a href="">新华国际时评:合则用不合则弃,看清美式“潜规则”本质</a></li></ul>`,};let list2 = {template :`<ul><li><a href="">重庆交通大学与四川藏区高速公路有限责任公司共建研究中心</a></li><li><a href="">重庆交通大学与四川藏区高速公路有限责任公司共建研究中心</a></li><li><a href="">重庆交通大学与四川藏区高速公路有限责任公司共建研究中心</a></li></ul>`,};// 1.创建路由对象const router = new VueRouter({//路由配置routes : [//每一个路由参数都是一个对象,每一个对象对应着一个路由{path : "/list1",component:list1},{path : "/list2",component:list2},],});// 2.注册路由new Vue({// el : '.container',router,}).$mount('.container')</script></body></html>
效果图
更多相关文章
- springcloud组件zuul报Forwarding error问题的解决
- 实战:一文说清OpenShift的Egress Router:OpenShift安全系列第八篇
- tomcat环境部署
- Vue开发推荐使用的7种模式
- 企业如何面对Tomcat的诸多安全漏洞?
- 如何让你的Service Mesh不再像个玩具?
- 组件必知必会|那些年我们使用过的轮子—Filter和Proxy
- 这次要是讲不明白Spring Cloud核心组件,那我就白编这故事了
- Spring Cloud Gateway2.0实践报告